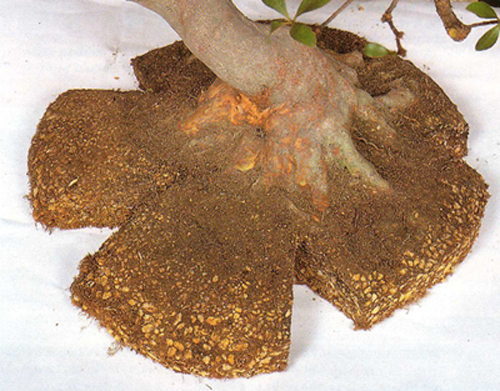
Mystified? If you are not familiar with the technique shown here, you just might be. All the photos in this post are from Bonsai Today issue 39.
Keeping some roots undisturbed
The technique shown here is particularly good if you want to replenish the soil while leaving some of the roots undisturbed. Doing this lessens stress and hastens recovery.
Pot sizes and shapes
The technique is useful when you want move a tree from a larger to a smaller pot, or into a pot that has a different shape. It also works when you want to replenish some of the soil and then put the tree back into the same pot and is particularly useful for repotting forest plantings.
Potbound trees
If the roots aren’t well enough established to hold the soil together when you take the tree out of the pot, then this technique won’t work. Ergo, this technique is particularly good when dealing with potbound trees.
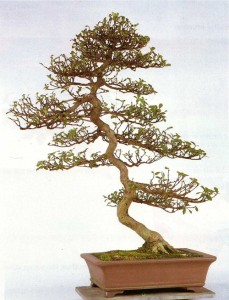
Before. A well developed Satsuki azalea in the wrong pot (agree or disagree?).
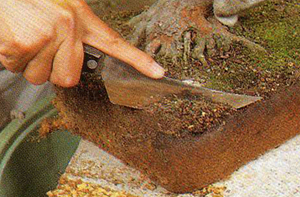 Cutting corners. Because you’re going from a rectangular pot to a round pot, you start by cutting off the corners.
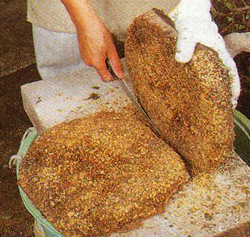
Removing the bottom roots. In almost all cases, you want to remove the lower roots. This encourages roots to spread out rather than grow down; because the tree mirrors the roots, it encourage the above ground growth to spread, which is want you usually want with bonsai. Another reason to remove the bottom roots is to make more space to replenish the soil.
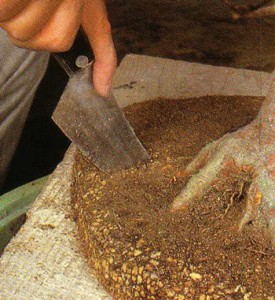
Little pieces of pie. Next, cut out little pie shaped pieces. Be careful to avoid damaging key roots that are supporting the nebari (nebari is the exposed roots that radiate out from the trunk and lend a sense of age and stability to the tree).
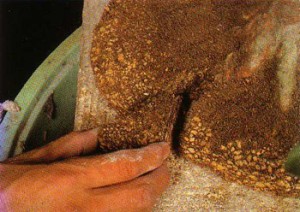
Removing the wedges.
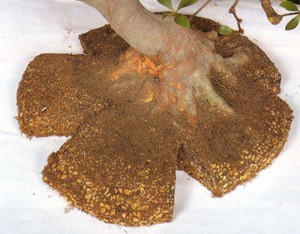
Protecting the nebari. Notice how the wedges aren’t too close to the nebari. It takes a long time to develop an impressive nebari, so great care is taken to protect it.
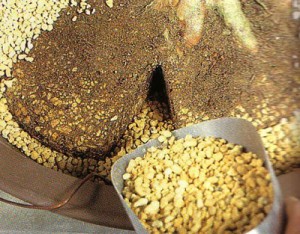
A couple steps later. After wire has been threaded though the drainage holes (to tie the tree into the pot) and fresh soil has been put into the bottom of the pot, the tree is placed into position and soil is used to fill in the rest of the empty spaces, including the where the little wedges were removed. The soil used her is Kanuma. It’s from Japan and is favored by the Japanese (and others) for azaleas.
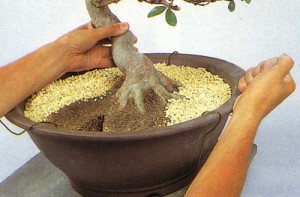
Tapping the pot. You can use your fist or a rubber mallet to lightly (but not too lightly) tap the pot to help the soil settle in. Notice the wire that will be used to secure the tree into the pot. Some westerners don’t bother with this, though all Japanese bonsai artists (that I know of) do bother. Wind and other factors (including human carelessness) can cause a tree to become loose in the pot. This can damage roots and impede growth.
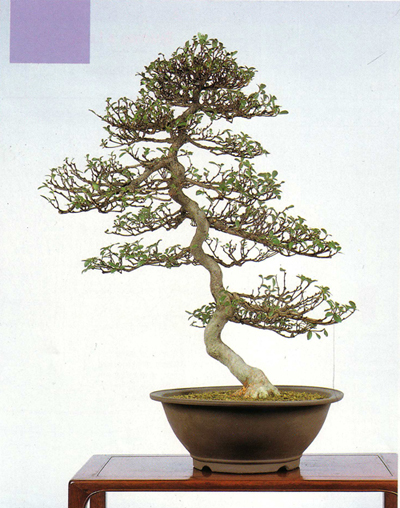
After: Doubly improved. The tree looks much better in this pot and healthy new roots can grow into the fresh soil. All you need now is water and some good fertilizer.
Thank you, Wayne. Very useful information and photos.
You are welcome Leonard. Stay posted for some more how-to tips.
Wiring your tree into the pot is also helpful as a reminder to double check the angle and position of the planting. Nothing is more humiliating than to discover that you’ve botched the placement of the tree after putting it through the trauma of repotting!
Actually, I can think of a thing or two that or more humiliating, but I get your drift and have had the experience more than once.