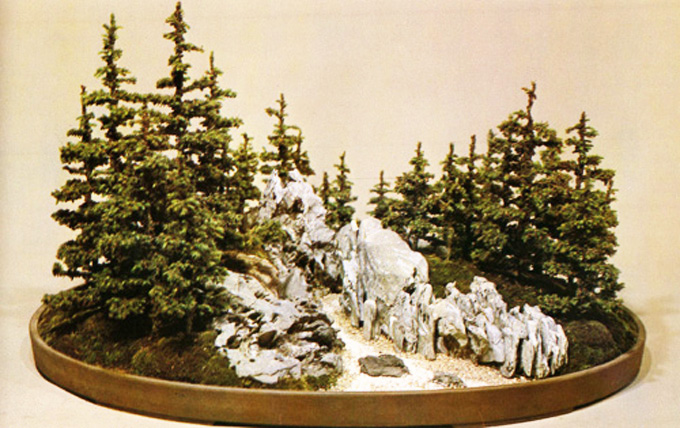
 This planting from Toshio Kawamoto’s Saikei classic is quite similar to the planting on the cover (below): same trees (cryptomeria), same (or nearly the same) pot and somewhat similar rocky ravine separating two tree and moss covered areas. The main difference is that this one shows a deep ravine. The rocks that define it represent tall vertical cliffs.
A long time ago (January, 2010 to be exact) we featured this post as part of a series on a remarkable book by Toshio Kawamoto. Now, because I’m still out of town on a vacation of sorts, it seems like a good time to resurrect the series. By the way, the book – Saikei, Living Landscapes in Miniature – is long out of print, but you just might be able to find it online. Or you could get lucky like I did and find it at your son-in-law’s bookstore (Green Apple, San Francisco).
Don’t worry this pillaging of our archives won’t last too much longer. Soon we’ll be back to fresh posts. Meanwhile, you might notice that we’ve been dressing up the originals with a few changes and a little value added stuff. For example, enlarging the images in this post.
How to create a deep ravine saikei
The purpose of this section in Saikei, Living Landscapes in Miniature is to show how to create a deep ravine saikei, just like the one in the photo. In fact, if you look at the drawings, it’s almost as if the author is inviting you to duplicate his work.
 Front schemata. The pot is 27″ x 19″ (69cm x 48cm) unglazed oval by Tokoname. There are 29 cryptomeria that range from 4″ to 14″ (10cm to 36cm) tall and 9 river rocks. The soil is regular bonsai soil (he doesn’t say which regular bonsai soil, but the Japanese almost always use akadama or an akadama mix for conifers). The other materials are moss, river sand and white sand.
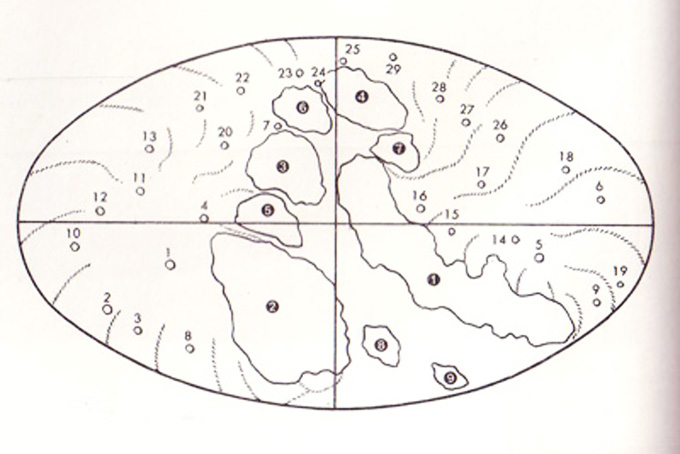
 Bird’s eye view. Notice how the opening in front is off center and slants and curves as it goes back. If it were directly centered and straight it would appear contrived. Notice also how the ravine narrows and curves around and disappears from sight and then opens up into a pool. Viewed from the front, this creates a sense of mystery and the appearance that it just goes on and on, off into a vast landscape, rather than being restricted to the small, finite area of the pot.
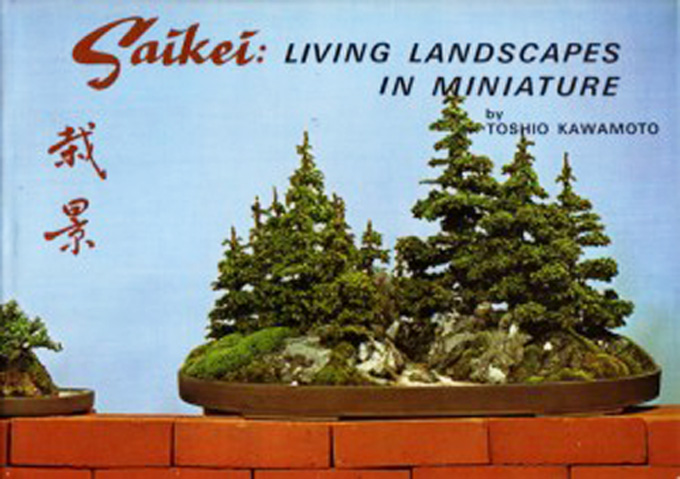
 The cover. At a glance, it’s almost the same as the planting feature in this post, though on closer inspection you can see marked differences.
The Deep Ravine in a Shallow Pot is such a pleasure to look at, study, and get lost in. Sometimes, when flying over rugged parts of mountainous regions, I see similar looking visual treasures, but only for a short period of time. Could someone please enlighten me as to how to repot it later when the evergreens start to outgrow the space. Does each individual tree need to be isolated and root pruned, or can each cluster of trees have its roots pruned along the outer edge and bottom?
Brian,
As the planting matures the tree roots will fuse below the soil surface. I have not done one of these personally but I would imagine this planting would be root pruned very carefully and trees replaced to preserve the image. -Dana
A complete repot of such a planting may sometimes result in replacing the trees in some other place than the original and the impact would be lost, unless you want to deliberately re-adjust the placement of the trees. Instead, you could try cutting wedge shaped portions of the rootball take out the cut soil wedge completely and replace the cavity with fresh soil. This can be achieved without actually removing the entire planting from the tray, can be done by removing different sections of the soil wedges over a period of time, allowing greater chances of sppedier recovery andles trauma to the plants. Unless of course, if the trees have really outgrown the proportions of the pot, where a bigger pot will have to be used. But essentially, this procedure can be implemented while using a bigger pot also.
I believe the philosophy behind Saikei was to utilize smaller immature material, not suitable for a
stand-alone specimen bonsai pot, to create a pleasing scene for a finite period of time. When the
material matured it could be separated out, potted as specimen trees with the remaining material
reconfigured into a new saikei. Therefore, repotting, per se, as with a forest/group would not be
necessary.
Hi Dana, Rajeev, and Jim,
Thank you for your explanations and advice. I feel encouraged that this project is something that I can handle. Now I am looking forward to going out and getting a suitable pot. And fortunately, the local bonsai place I go to, has lots of pre-bonsai material. Might even consider a forest of Jeanne Dilly dwarf alberta spruces. That one picture really inspired me!
Regards, Brian
Hi Brian
The best of luck to you. Although we cannot cultivate Alberta Spruce in the tropical climate where I live, from photos that I have seen, I think they will look just great.
Hello Rajeev and everyone else,
Good conversion. Thank you all for contributing.
-w