Back to the beginning
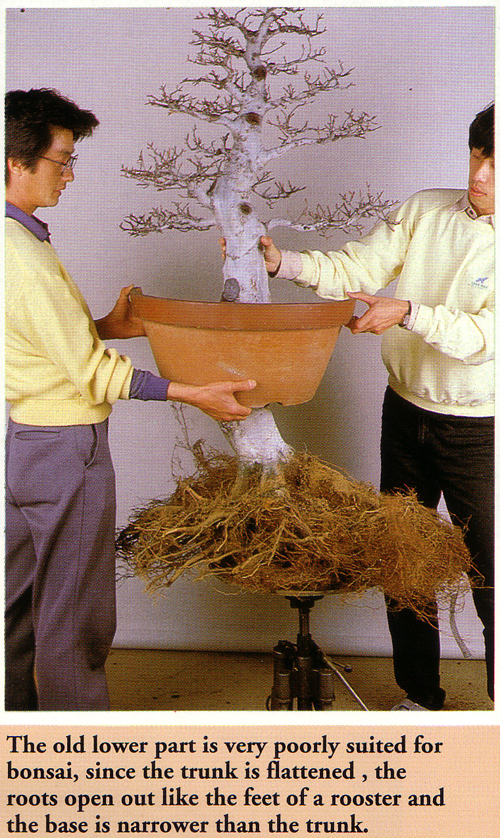
Mr. Sinichi Watanabe has decided that this impressive old Japanese beech (Fagus crenata) needs to be air-layered. The photo shows two assistants holding a training pot (cut in half for the photo) to show what the tree will look like after it’s layered. The original article appeared in Bonsai Today issue 48.
Picking up where we left off
In our last post we showed the first few steps in Mr. Watanabe’s air-layering technique. This post will show the last step in the previous post and the next series of steps. We’ll need a third post to complete the process.
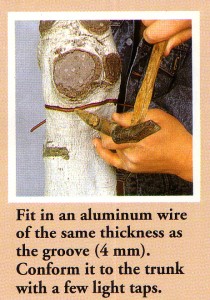
Step 4. We showed this step in our last post (it would have made more sense to end with the next step, so we’re showing this one again for continuity’s sake).
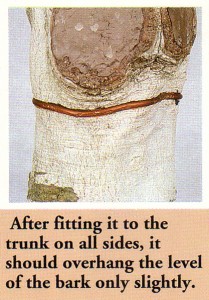
Step 5. The “it” that should overhang, is the wire.
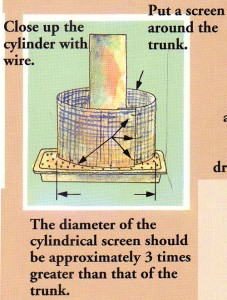
Step 6. A cylinder is formed with (wire or plastic) screen. The article doesn’t mention the size of the holes in the screen, but it will need to be small enough to hold the soil in (see the next step). The pots size in this illustration is misleading; the trunk is much to large for a pot that size.
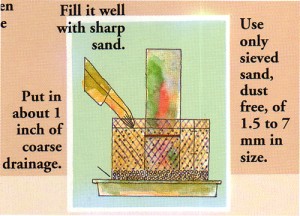
Step 7. The bottom layer is very coarse. The rest of the sand is 1.5 to 7mm (1/16″ to 1/4″).
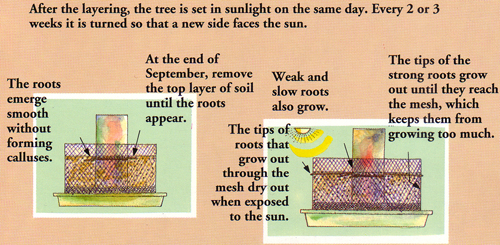
Step 8. Notice it says “At the end of September.” The process started in February, but that’s somewhere in Japan. You’ll need to adjust the timing to suit your climate.
Stay tuned for the final post on this technique. BTW: The three posts taken together will show less than half of the the original article. If you’d like the whole article, Bonsai Today 48 is still avaliable.