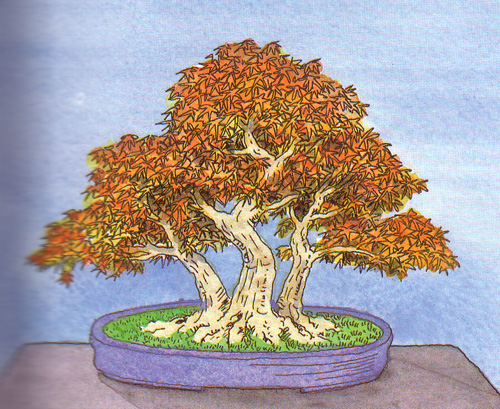
Artist’s rendition of what a nebari might look like using this technique.
If you are a very quick study or an old bonsai maven (or both) you probably figured out how to use this technique using just the three images in the previous post. However, if you need more detail (can’t hurt), here’s a big hunk of the rest of the original images, which appeared in Bonsai Today issue 8.
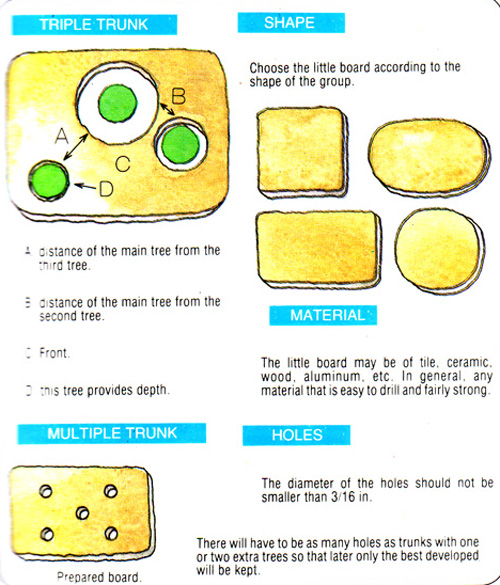
You can use a tile or board or something similar. I just today got this email today from Mollie Hollar: “…the late Ron Martin of Tokonoma Bonsai used old/useless CDs under his trees to develop nebari. A great way to reuse!”
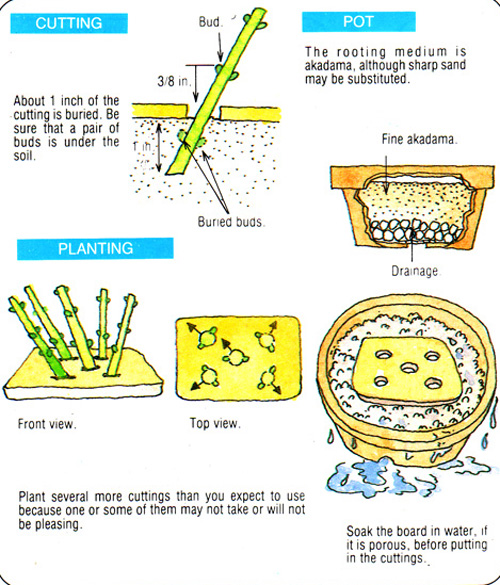
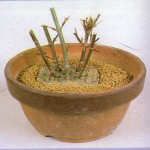
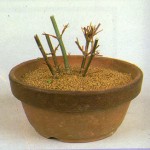
The photo above shows a growing pot with the freshly taken cuttings sticking through the tile. In the photo below about an extra half inch (1.25 cm) of soil was put on top of the tile.
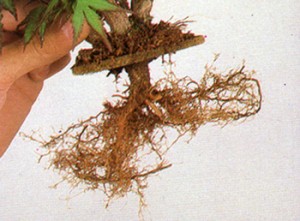 Several years later, the whole strange conglomeration; tree, roots and tile is lifted out of the growing pot. This shot was actually taken after the top roots (above the tile) had been pruned and all but one of the lower roots had been removed. (Note: both the lower and upper roots were periodically pruned in the years before this stage.)
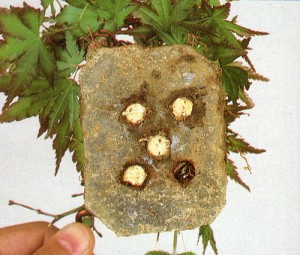
From the bottom just after the lower roots were cut off.
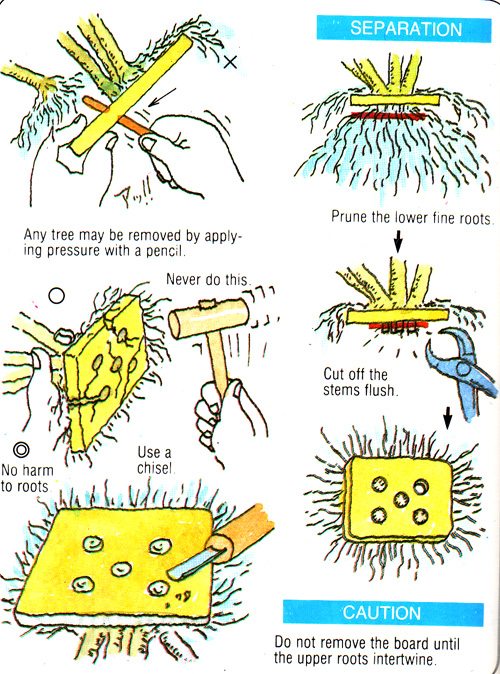
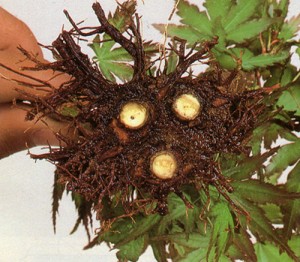 Now the tile has been removed and so has one of the trunks. The missing trunk was pushed out of the tile with a pencil (see further down). It will be used elsewhere.
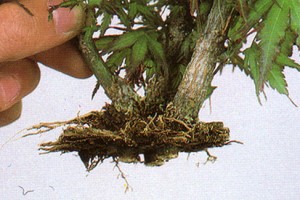
From this angle you can see that not much in the way of roots is left to support the tree. The solution will be to dramatically thin the foliage.
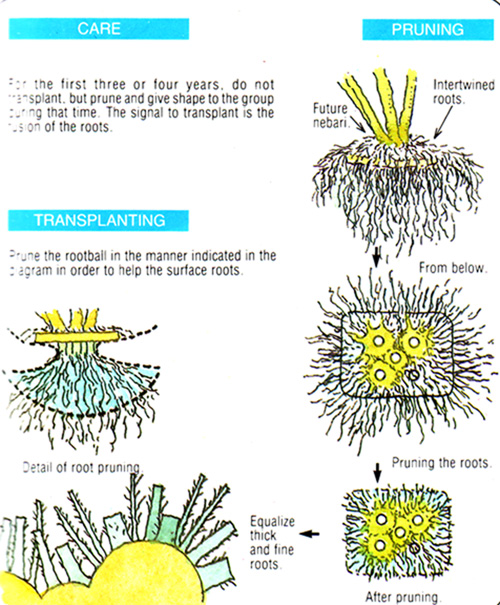
The drawings below might help clarify the final stages of the process.
Hey just wanted to give you a quick heads up. The text in your article seem to be
running off the screen in Chrome. I’m not sure if this is a format issue or something to do with web browser compatibility but I figured I’d post to let you know.
The style and design look great though! Hope you get the problem solved soon.
Many thanks
Thanks decije igre,
No problem with Chrome here. Probably something to do with your settings.