Still Opulent, Outrageous & Outstanding

102 
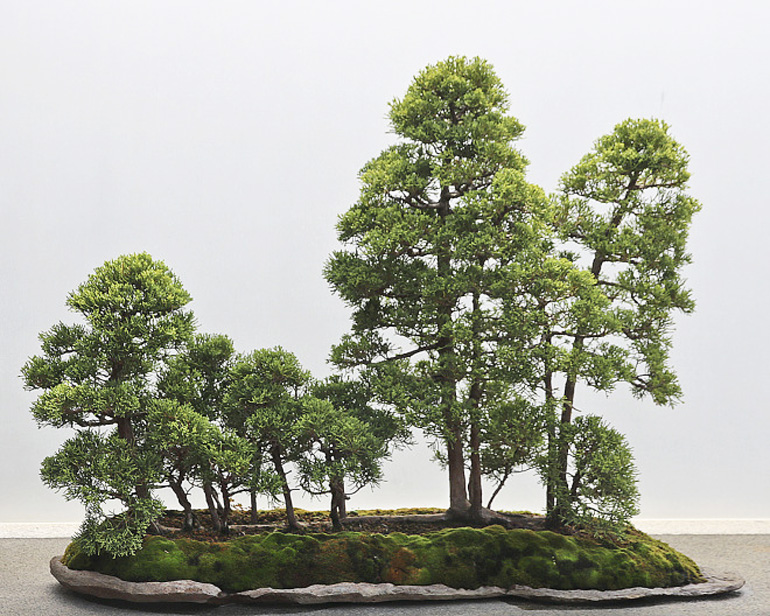
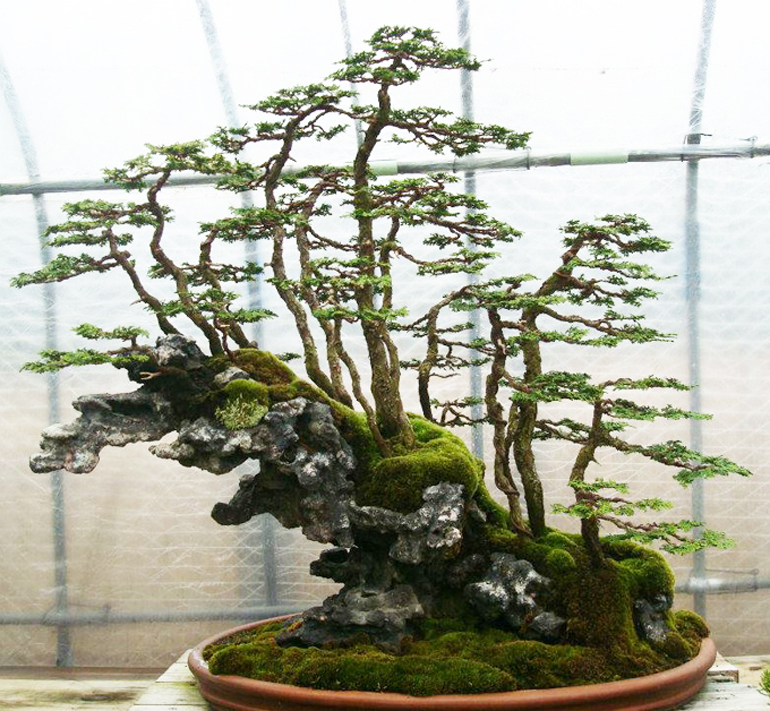
This Itoigawa Shimpaku (Juniperus chinensis 'itoigawa') by Dougie Smith qualifies as opulent for sure. Outrageous? Well there is that huge rock jutting up from the skinny little (but very handsome) pot. As for outstanding; that goes without saying. Note: I don't know what the smaller trees down low are. Maybe azaleas? Myrtle? This photo and the others in this post are by Philippe Massard, though I cropped them all to bring the trees closer.

A quick two day vacation and another dip into our archives. This one is from February 2014. I picked it to show a second time, primarily because of the tree above (not to downplay the other great trees). The size of the massive rock and the tree taken together relative to the size of the pot is unusual, to say the least. And it works.

All the photos in this post are from the Noelanders Trophy XV which was recently held last year in Belgium. The photos are all borrowed from Philippe Massard (cropped to bring the trees closer). The five chosen here are a drop in Philippe’s photographic bucket. I picked these five mostly because they are unusual. This is not to say that there weren’t numerous other unusual trees featured; Europeans seem to be on the cutting of edge of unusual bonsai these days.

Just in case anyone is ready to jump to any misunderstood conclusions, all three words in the title, Opulent, Outrageous and Outstanding, are meant in the positive sense. Opulent as rich rather than ostentatious. Outrageous as unconventional, surprising or even shocking, as opposed to very bad or wrong. Outstanding simply means outstanding, in every sense of the word.


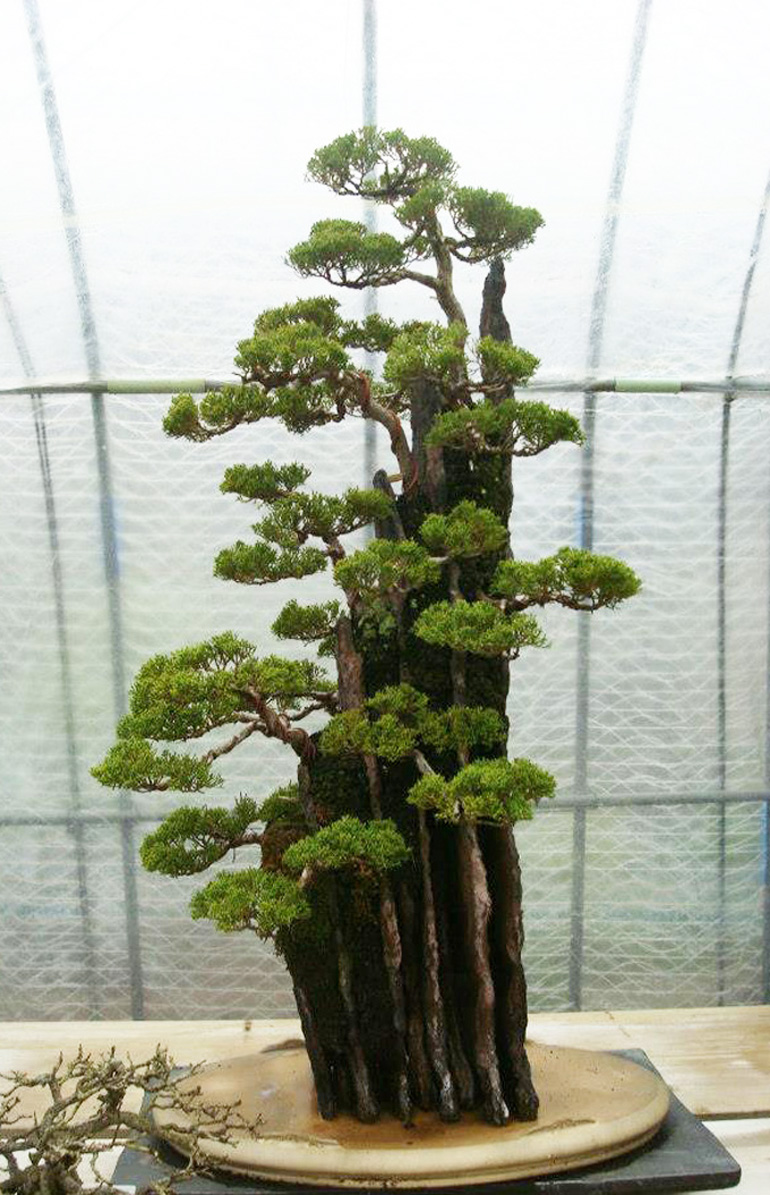
A very uncommon, Common juniper (Juniperus communis) by C.Przybylski. Not very opulent, but outrageous for sure. And undeniably outstanding. Especially considering you almost never see good Common juniper bonsai (American bonsai artist, Nick Lenz provides some exceptions).


419This stubby Trident maple (Acer buergerianum) is by John Pitt. I'll guess that the excellent pot is also by John. The nebari most def qualifies as opulent, outrageous and outstanding, though such things are not uncommon on Tridents.


231Austrian pine (Pinus nigra) belongs to Mauro Stemberger. This one just might be my favorite. It and its wonderful pot qualify in every sense; particularly opulent and outstanding. We'll leave the outrageous up to you. BTW: great shadow, just in case you missed it.


97English yew (Taxus baccata) from the fertile mind and sure hand of Tony Tickle. Outrageous! Outstanding! Not so opulent (well, maybe the books). And then there's that excellent bridge type slab that the tree is clinging to. It's by Erik Križovenský. We've featured his innovative pot art here on Bark.


Tools-Koyo1-500x303

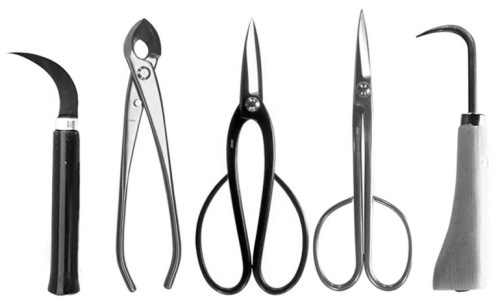
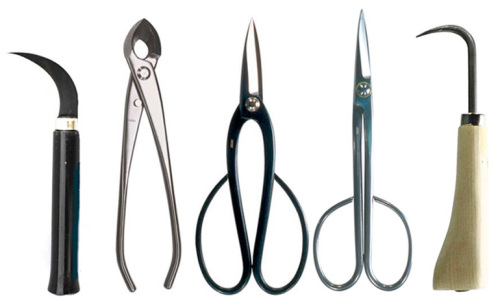
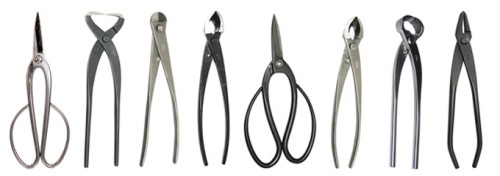
25% off all Bonsai Tools
and Japanese Gardening Tools
Additional 10% off orders 100.00 or more

Two Beautiful Bonsai & Two Questions

acer
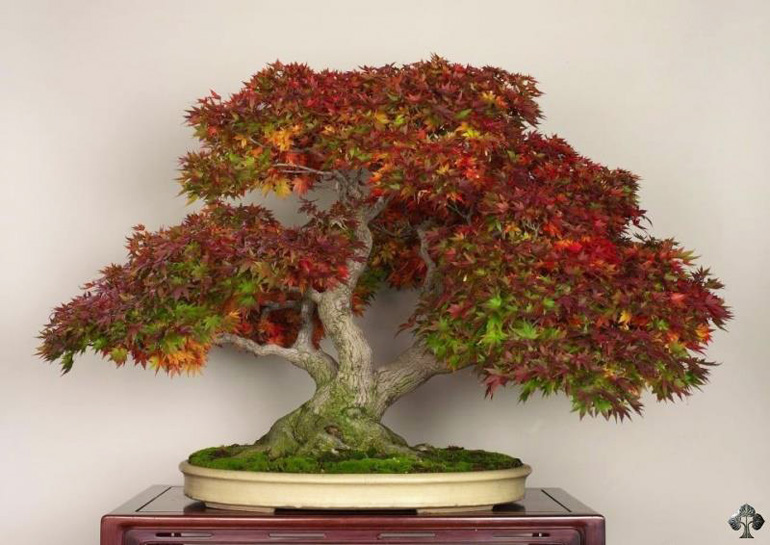
I would love to know more about this this powerful Japanese maple, especially the artist's name. I recognize the logo in the corner, but there are no credits with the photo.
Thanks to Michael Bonsai we now know this tree is from the Omiya Bonsai Art Museum collection.

NOTE: Since we posted this Oscar from Bonsai Empire has gotten in touch and very graciously thanked us for pointing out the problems. He came up with a solution to attribution and is working on other solutions. My thanks to Oscar and friends. I look forward to meeting you at the Artisans Cup.

Both photos shown in this post are from Bonsai Empire’s online gallery. There’s a lot to like about Bonsai Empire and we’ve shown photos borrowed from them over the years. Still, there are a couple things they do that might provoke questions.

Attribution. Bonsai Empire does attribute the bonsai artists on facebook but I wonder why they don’t bother to attribute on their online gallery. It would be easy for them and save a lot of trouble for those of us who would like to know who the artists are.*

Logo placement. Bonsai Empire puts their logo on photos that do not belong to them. As far as I know, they are the only ones in our bonsai community who do this. This strikes me as strange at best and I have to wonder how they justify this practice.

pallmapleThis Japanese maple belongs to Walter Pall. This and other photos of this famous tree have appeared in many places including Walter's website. The question is; what is Bonsai Empire's logo doing on the photo?

* In their online gallery Bonsai Empire states the following: “For the photocredits, check the Bonsai of the Day albums at our Facebook Page!” I tried this with both photos shown here, but gave up after five minutes of scrolling down through both their feed and photo galleries.


ac8fa1f6-a9c8-45d6-b0e7-b396b183569d-1 60% off Bonsai Today back issues
Every issue contains clear, insightful instruction from Japanese masters
& western commentary on indoor and tropical bonsai
truly an invaluable resource for any bonsai enthusiast

Tamarix Bonsai – An Unusual Tree

tamarix

I can think of at least three reasons to be impressed by the tree. First, it's a Tamarix tenuissima* (a type of Salt cedar), an usual genus and a very unusual species, when it comes bonsai at least. Second, it's a beautiful, well-balanced, dynamic bonsai. And third, wiring every single little branch down, is a true labor of love. My only complaint is the fuzzy photo and that's on me (I blew it up to fit our format).

It’s Monday morning and I’m already way behind schedule, so we’ll keep it short and simple; one tree, a variety of Salt cedar,* and one bonsai artist Naoki Maeoka, a resident at Kouka-en nursery and teacher at the Fujikawa Bonsai School.


tamarixbefore&after

Before and after. I wonder how many hours Maeoka san spent wiring.

*Like so many other misnamed plants, the Salt cedar is not a cedar (it does thrive in akaline soil). The species, tenuissima is one of 50 to 60 Tamarix (Naoki calls it a Gyoryu). I could say more, but if you’re one of the two or three people who are interested, you won’t mind doing your own research (you might start here).

Starting right now, we’ve got four New Sales for you

TM-Roshi Banner

25% off all of Bonsai Tools

25% off all Garden Tools

60% off Bonsai Today back issues

An additional 10% off all Stone Lantern orders of 100.00 or more

Shaping Bonsai with Rebar, Turnbuckles, Stones, Wire – Everything but the Kitchen Sink

benafter42

This is what you can do with a little daring and more than a little skill. The huge crack just up from the base of the trunk is intentional. Without it, there's no way this old tree is surrendering that first subtle bend and without the rebar and wooden peg there's no way the second larger bend is holding. This photo and the before photo below are from David Benavente's Estudio de Bonsai.

This post, which provides valuable tips on some relatively obscure bonsai techniques, is a mishmash from three previous posts.

benbefore4
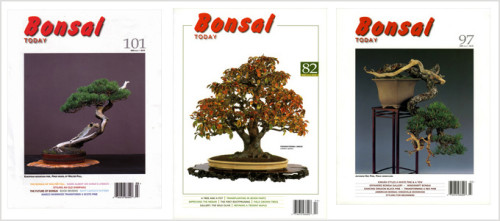
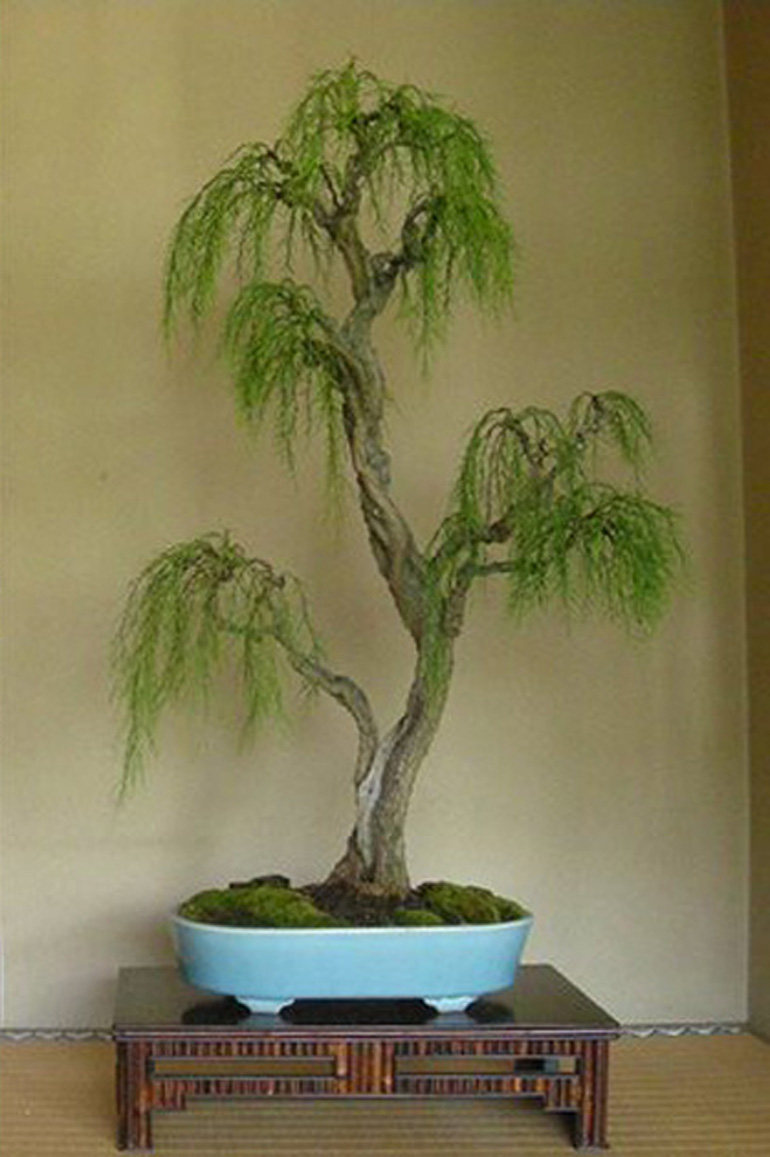
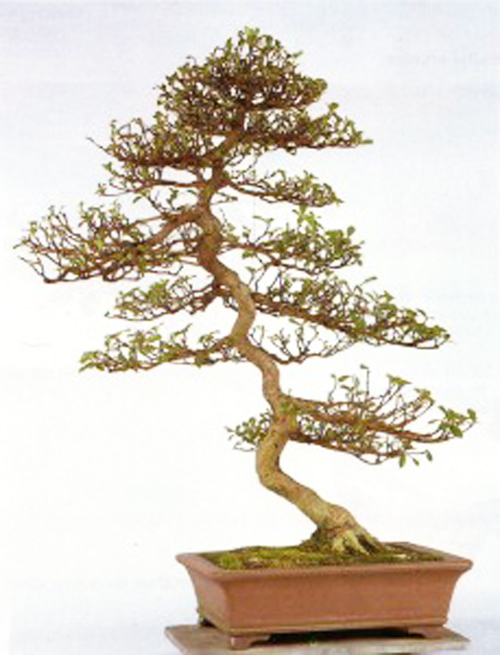
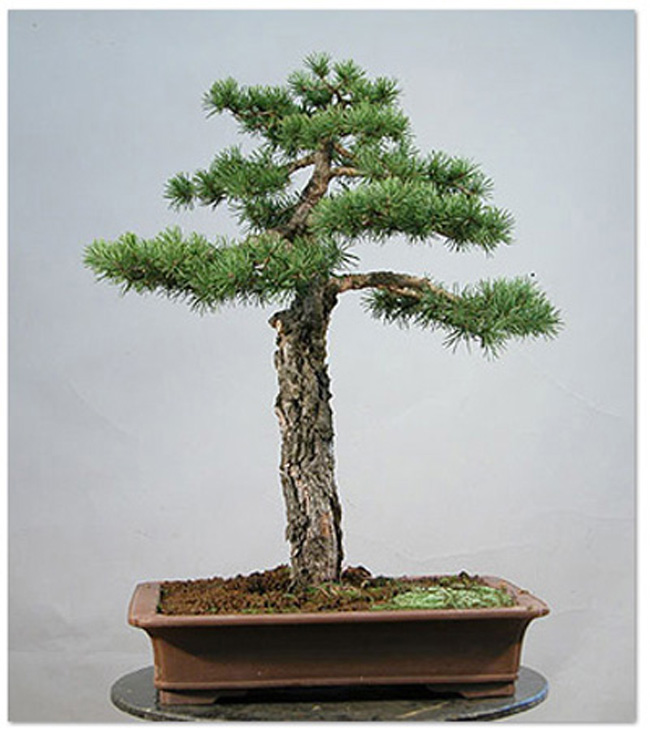
Before. What would you have done?


wiring1This simple and clear illustration (from the ABS website) shows how to use a turnbuckle to lower a branch. The turnbuckle is made up of a single strand of wire, a short stick (or short piece of heavy wire) and two rubber pads to protect the branches. Beyond that, it needs no explanation.


7

Another clear illustration from same ABS article that shows one way to wire two, using a section of trunk as anchor. This illustration originally appeared in Debra Koreshoff's Bonsai, Its Art, Science, History and Philosophy (out of print). It was modified by George Buehler (on the ABS website).


bill22

Another pine and another radical technique. This cut will serve two purposes: first, it will make it easier to lower the branch, and second, it will provide a place to insert stones (yes, stones) to keep the branch from popping back up. This photo is originally from a Bill Valavanis’ open house back in 2011. We posted it under the title, Restyling A Stubborn Old Tree. It provides an excellent lesson in dealing with an old tree with defects that require radical measures to correct.


Bonsai Wire Sale ends tonight

Wire3

25% off Bonsai Wire
all of our vast wire selection is now 25% off
but only until 11:59pm EDT tonight


Powerful Pines & Bonsai Wire

BC1This powerful pine with its aged, heavily plated bark (reminiscent of our North American Ponderosa pines, especially the reddish section at the base of the trunk) is one of many spectacular trees displayed at the recent 2012 BCI convention in China. This and all the photos in this post are courtesy of Robert Steven.

Summer sun beckons, so we’ll take the easy way out once again. This post, with some text added today (in italics) originally appeared in April, 2013.

Pines now, the rest later. Robert Steven just sent us a whole host of great photos from the recent 2012 BCI convention in China. We’ll start with some powerful pines here, and then show you some of the other trees in a few days.


BCI5If you think you've seen this forest recently you are right. We featured it less than two weeks ago as part of our series on forest plantings.This has to be one of the most impressive pine forests anywhere. Actually, you can scratch the pine part and we'll just leave it at one of the most impressive forests, period. Most of us would be more than delighted to have any one of these trees in our backyard, let alone the whole planting. Nice pot too. Looks a bit like an escarpment in the Rockies.


BCI21Another powerful trunk. This one is accented by two whirling circles.


BC14

Looking up at this angle it's easy to imagine you're looking at some massive old-growth Ponderosa pines in the Rocky or Sierra mountains. This effect is heightened by the heavy reddish-orange bark; a striking feature of Ponderosa.


BCI3I like the way this one doubles back on itself as though it has spent countless winters under a heavy snow load. Great taper on another powerful trunk too.

Bonsai Wire Sale Ends Tomorrow Night
wire

25% off Bonsai Wire
all of our bonsai wire is 25% off our already low prices
plus an extra 5% off on orders 100.00 or more
but don’t wait this sale ends tomorrow night
Sunday, August 23rd at 11:59pm EDT

Digging & Field Growing Bonsai in the Early Fall

satsuki-kennett
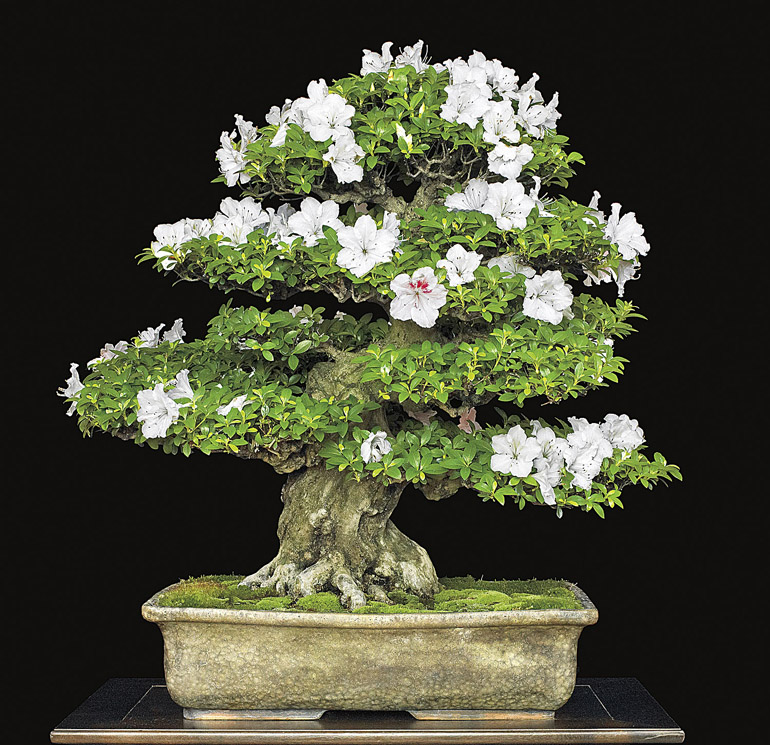
This sumptuous Satsuki is from Bill Valavanis' 2014 Japan Satsuki tour. Though I don't know for sure, based on the massive trunk it's easy to imagine that it was originally field grown. 

Early fall is good times to dig and transplant. For me, it’s mostly native larch (some cedar and spruce too) from a friend’s land here in northern Vermont. However, unless you live in the frozen north or blazing tropics, Satsuki azaleas just might work for you.

This post (from 2009) is taken from one of many field growing posts we’ve done over the years. I have edited (italics) based on what I’ve learned since 2009 and because it was originally written for spring transplanting.

In our last field growing post we mention planting directly into native soil without digging in amendments when you plant (Cornell University and others have researched and compared planting in native soil versus amended soil pockets, and native soil wins for size and health). A friend of my points out that she has no native soil; her house and yard were built on fill. In our usage of native soil, we mean whatever soil is already there. In other words, my friend’s fill would be her native soil.

What if your native soil isn’t very good? Too acidic, too alkaline, too heavy, too poor? How do you know if your native soil is good enough to simply plant as is?

The simple answer is; just look and see what’s growing there. If relatively vigorous plants are already growing in your native soil, then it should be okay for field growing. If not, you might want to consider building raised beds, or hills with enriched soil.

Here, even though the soil around the house is quite sandy, plenty of trees and other plants were growing just fine when I moved in five eleven years ago. So my lazy person’s method of enriching by top dressing and fertilizing after planting, has worked quite well (continued below the photo).

satsuki-bt40
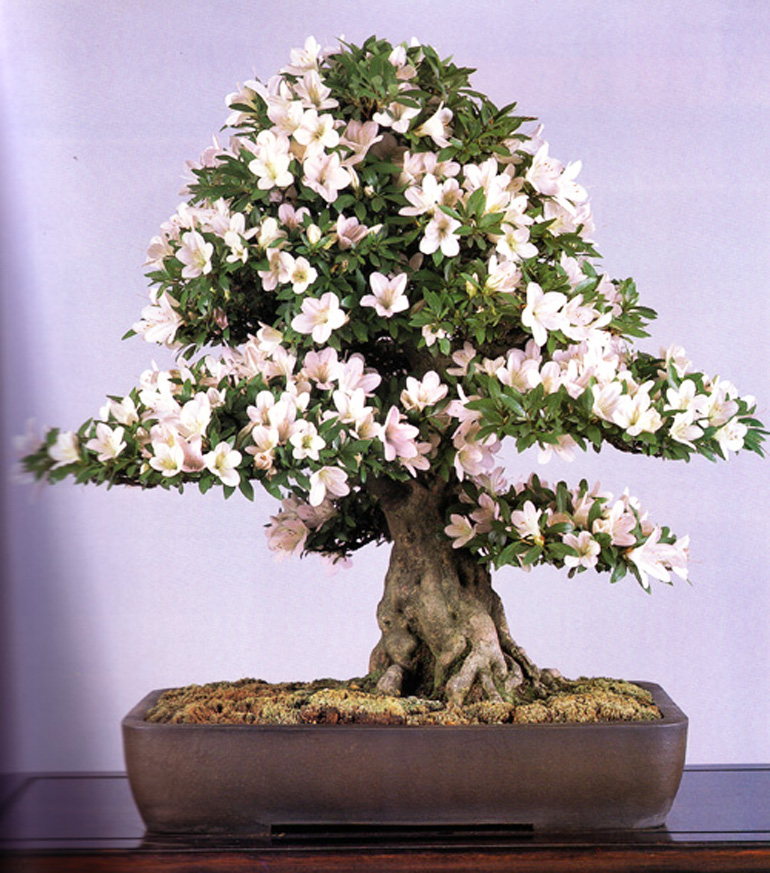
Here's another powerful Satsuki azalea that may have been field grown (it's from Bonsai Today issue 40, courtesy of Bonsai Focus magazine).


In some cases, I just plant directly into the ground (this works because the drainage is excellent). In other cases building little 1 t0 3 foot mountain ranges works for me, using soil from around my land and some fill from outside (also quite sandy). This way future future bonsai stock is incorporated right into the landscape (some will never be bonsai; they look too good right were they are).

Before planting I top prune (always top prune when you disturb the roots, especially if you rootprune) and rootprune if needed, and spread the roots and dip them in Roots, a rooting compound in solution, and then plant.

I’ve learned to back off on top pruning when transplanting. Some is often necessary, but anything beyond very selective pruning can further stress a freshly dug plant. And I now use Dyna-Gro K-L-N.

Next, I top dress with partially broken down cedar mulch about two inches deep. I used partially broken down mulch because wood robs nitrogen in the early stages of breaking down and then gives it back to the soil in the final stages. This mulch blanket helps protect the roots from the cold and the soil from drying out too fast.

Then, because the plants need help at first and because my soil is very sandy, I top water deeply (unless there’s a good soaking rain). Deep enough for the water to soak well below the roots. If the weather stays dry after transplanting you might need to deep soak several times during the fall.

Starting in the very early spring and three or four times a season I sprinkle on a local organic granular slow release fertilizer (I use Green Dream and other bonsai fertilizers for plants in containers, but they are a little expensive for field growing).

In the late summer and early fall it’s important to reduce the amount of nitrogen so energy is directed to the roots and nutrient storage and away from top growth, so I use a more highly diluted mix of fish/seaweed and instead of Dyna-gro 7-9-5, I switch to 3-12-6. Now I just stop fertilizing in the field around August first.

There’s much more to say for sure, but meanwhile, if you have any question or objections, or just want to share your field growing techniques, don’t hesitate to comment.

Stone Lantern
SPECIAL OF THE DAY

   Fine tooth Bonsai Saw

SPECIAL OF THE DAY

a sturdy affordable saw for large bonsai branches, tough roots
and a range of garden tasks
wooden handle, 5″ (12.6cm) blade
list price 14.65
previous special only 9.95
SPECIAL ONE DAY ONLY 5.95
this SPECIAL of the DAY offer ends Saturday August 22 at 9:00am EDT

Playing It Straight

BillMidAm

Straight line raft Juniper. I borrowed this photo from Bill Valavanis' blog. Bill took the photo at the 2015 38th Mid America Bonsai Exhibit.

This is a somewhat failed attempt to finish our series on forest plantings. Specifically raft style forest plantings. More specifically straight line raft plantings.

Problem is, couldn’t find good photos of straight line rafts (the exception is above). So rather than spending more time searching, we’ll settle for some informative text on raft-style borrowed from ofBONSAI Magazine (one of the better online bonsai sites).

Raft style bonsai mimic a natural occurrence when a tree topples onto its side due to heavy winds, a flood, or soil eroding beneath the tree. Branches along the top side of the trunk continue to grow as a group of new trees. Sometimes, roots will develop from buried portions of the trunk. Raft-style bonsai can have sinuous or straight-line trunks, all giving the illusion that they are a group of separate trees creating a unified apex.

Advantages of Raft style
Are that it is not seen often. We have the ability to use a large main trunk and create multiple trees off of that line. This is great because it shows great age as if the tree was blown over a long time ago, re-rooted itself and kept on thriving; Each branch becoming its own tree and creating its own apex. It is really intriguing to see a raft style bonsai and is a real advantage to presenter when created correctly. The trees will balance off each other like in a forest planting, but in this style we have the ability to display it as one tree instead of multiples as in a forest.

Disadvantages of Raft style
“Are finding a suitable tree. Yamadori raft style is very rare and prized…”
There’s more here.

Win! If you are one of the three people who read this far, here’s your reward (well, potential reward). Send me a high quality photo of a high quality straight line raft style bonsai and you’ll win a 25.00 gift certificate to Stone Lantern (I will be the sole judge of what constitutes quality). Offer ends August 31st 2015.

Just in case you missed (or blocked) our add at the top of the post, here’s another reward for reading this far down.

wire25% off all Bonsai Wire. Plus an extra 5% off for any Stone Lantern order of 100.00 or more.

Kimura Rocks

1kim61

The mature look. It helps to start with well developed trees. I think most of us would be happy to have trees like these Shimpaku as single bonsai, let alone as parts of group plantings.

It’s hot here in Vermont, my bonsai need water and so do I. Once again it’s time to dig into our archives and vacate this office. This post originally appeared summer before last and again last summer.

A question about watering came up when this was originally posted. I’ll preempt this time with my answer:
“My guess is the hinoki plantings are kept in shade or semi-shade which would help keep watering requirements somewhat manageable. Shimpaku on the other hand do best in full or near-full sun, so you might imagine that on hot sunny days more than one watering is in order.”

Kimura’s rock plantings. These photos are all from a posting by Alejandro Sartori that he took during a recent visit to Masahiko Kimura’s nursery. I’ve chosen to pick out some rock plantings from a much larger selection of Alejandro’s photographs of Kimura’s trees. I think they represent an aspect of Kimura’s revolutionary bonsai journey that may not be as familiar as some of his other bonsai, particularly his famous dramatic large bonsai that he sculpted using chainsaws and other power tools.

I believe that at least some of the rocks in these photos were constructed by human hands. Quite possibly even by Kimura’s famous hands. There is a chapter in The Magician, the Bonsai Art of Kimura 2 that shows how to construct a layered vertical rock. The second photo down features one of these.

By the way, all of the plantings shown here are root-on-rock style as opposed to root-over-rock style.

2sweet21

Are these trees Hinokis? It's hard to tell for sure, but that's my best guess. It's also hard to tell the size of this planting without something to contrast it with, though you might imagine that it's quite large. My guess is that the pot is somewhere around 30 inches (76cm), which would make the planting about 40 inches (100cm) across, but that's just a guess.

3kim21

Another Shimpaku planting. The trees aren't quite as developed in this one, but they're still pretty good. It's fairly easy to see that the rock was constructed in layers. There's an excellent chapter in The Magician, the Bonsai Art of Kimura 2, where he shows how to do this.

4kim9

I like the way the trees (Hinokis again?) grow straight up along the side of rock on this one. This serves to emphasize the rock's strong vertical movement. This is further enhanced by the way the crown of the rock thrusts up above the trees.

5kim32

The eccentric. I think this one is the most unusual of the lot. Perhaps a big part of that unusual feel is the distinctive shape of the rock. In contrast to the planting immediately above, these trees (Hinokis again?) create a whole different feel by growing down and away from the rock.

B1KIM2-6

If you want to see how Kimura does it, this is the right book. And, it’s now on special at Stone Lantern.

Bonsai Photos: from Black & White to Colorized and Back

BT2coverBW
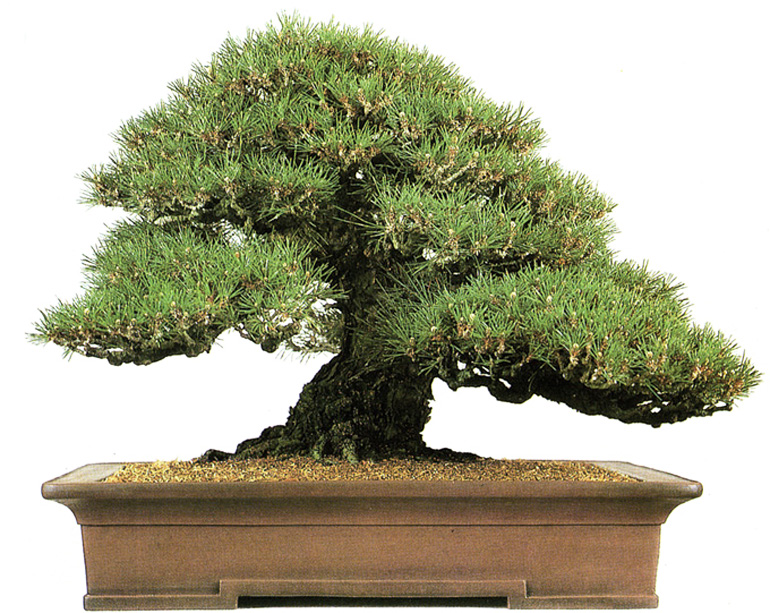
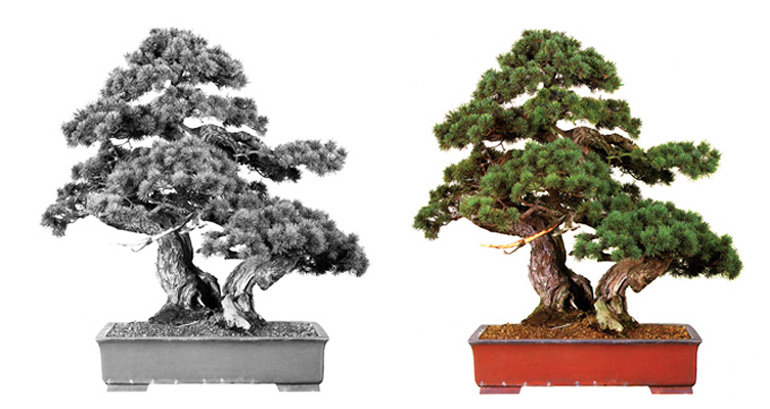
You can find the color version of this Japanese white pine on the cover of our Masters' Series Pine book. The black and white version is the same image with the color photoshopped out. Though the B&W version does have it qualities, the vivid pot color and the robust green foliage provide a strong argument for shooting bonsai in color.

This post is a composite of two posts from 2012 with some thoughts added today. The attempt is to contrast B&W bonsai photos with color bonsai photos.

There are four types of photos here. Black and white photos. Color photos. B&W photos that were photoshopped from color photos. And one photo that was colorized from an old B&W photo and then photoshopped back to B&W.

Though color is the almost unanimous choice these days, there does seem to be something compelling about a good black and white photo. Maybe the stark quality of black and white highlights features that we might otherwise miss.


Here's a good one from flickr that was taken in B&W. It's starkly beautiful in B&W, especially the way the absence of color heightens awareness of light and shading. Also the texture of the foliage. It's titled Black and white bonsai tree, The Huntington library Japanese garden. My best guess is that it's a Shimpaku juniper grafted onto San Jose stock. Something you often see in Southern California. Especially at Chikugo en Bonsai Nursery.


This Pemphis acidula is called Snake Dance. The bonsai artist is Gede Merta. The black & white version was photoshopped.


Here's B&W full sized so you can get a better look. Without color and without much shading, it takes on a ghostly look.


From B&W to colorized and back. This one is titled Hangyoku with her bonsai tree (1905). You can get a feel for just how far bonsai has come in the last hundred plus years. The colorized version is from here. The B&W version was photoshopped from the colorized version.


Shot in B&W. These two photos by Morten Albek are what got me thinking about the value of black and white photos.
 This photo, titled bonsai in black and white was shot in December 2009 at the National Arboretum by Brian Hefele. He was using a Sigma DP2.

Comments from Bonsai in Black & White part 1
Here are three of the comments from our first of our two original posts on B&W vs color. I think each one sheds some light (no pun intended) on our discussion.

During the punic wars, when I was in college studying photography, … Freshman and Sophomore students were only permitted to work in black and white. It wasn’t until the Junior year that they were permitted to enroll in color photographic courses. The psychology was that while color adds a great deal to a photo, it can also be a great distraction from the more important things a photographer needs to learn such as composition, use of light and shadow, texture, lighting, manipulation of depth of field, etc, etc. First and second year students needed to master these aspects of the photographic art and in the beginning, color was considered too much of a “distraction” for beginners to have to deal with.
Randy Clark

All to often people convert their color images to black and white and feel that they turned a ok picture into something better. In my opinion black and white photography takes a much greater understanding of light. I agree that a good black and white photo would highlight things that would otherwise be missed. I think it has to do with creating a balanced overall image (light, contrast, tonal range) would add light detail to areas otherwise lost in shadow. As is displayed with your examples. The picture of the shimpaku picks up a lot of detail but the picture of the pemphis becomes flat. I think this is an interesting topic that delves into another art form. Light and composition make a photo and sometimes what works in color doesn’t necessarily convert to black and white without considerable effort (photoshop). But hey that is just my opinion. Cool post.
Matt Logan

In traditional film photography black and white films were available that had very distinct contrast and gray response that color film often did not. That is why many of the older photos showed such exquisite detail. In modern digital photography I think the closest you can get to that range of contrast is with HD techniques, using multiple exposures of the same subject, but those are usually used with contrasty colors for eye candy. I think a serious photographer that was after the older B&W film effect with a good grasp of HD photography would have an avid audience in the bonsai market.
Zack Clayton

Two photos from an article titled The Culture & Training of Dwarf Brush Cherry Bonsai that appeared in Bill Valavanis’ International Bonsai magazine. Color is clearly an advantage when it comes to flowers.

 Tools-Koyo1-500x303Can you tell if this photo of Koyo Bonsai Tools (now 25% off)
was shot in black & white or color?

Fall Transplanting: Timing and a Light Touch

pineA freshly transplanted Black pine. From our Masters' Series Pine book.

When it comes to transplanting, timing depends on your climate. This post is based on conditions here in northern Vermont where seasons can change rapidly and winters are very cold. If you live in a warmer climate, there is more margin for error.

One advantage to transplanting in the early fall is that when the spring season starts, little or no growing time is lost. Roots experience strong growth in the fall while the soil is still warm and after the top has shut down. By the time the tree wakes up in the spring, the roots are recovered and top growth is vigorous.

There’s one caveat however; in cold weather climates, heavy root pruning is best saved for the spring. If cold weather sets in too soon before the roots have recovered, winter survival can be threatened. Better stick to light root pruning in the fall if you live where the winters are cold.

Don’t wait too long, especially if you live in a cold climate where seasonal changes can happens quickly. Here in northern Vermont, we’ve had the best results from the last few days of August to the around the 10th of September (our first hard frost can happen any time from mid-September to early October, though there’s almost always several weeks of mild weather after that; keeping the soil warm enough for roots to recover).

It can be a good idea to lightly top prune when you transplant, especially if the roots have been severely disturbed (less foliage for the compromised roots to support). However, too much top pruning when transplanting, can stress a tree. In general, much depends on variables like the type tree, where you live, when you transplant, your aftercare and so forth.


These three items are useful transplanting. aids. Surperthrive is a vitamin and hormone plant tonic, Myconox helps replace the all-important mycorrhizal fungi, and Dyna-Gro K-L-N is a rooting compound that is formulated to reduce stress and encourage growth.

The photos and text from here down are from an 2010 Bonsai Bark post titled Transplanting Tips: An Uncommon Technique.


piePieces of the pie. From Bonsai Today issue 39.

Keeping some roots undisturbed
The technique shown here is particularly good if you want to replenish the soil while leaving some of the roots undisturbed. Doing this lessens stress and hastens recovery.

Pot sizes and shapes
This technique is useful when you want to move a tree from a larger to a smaller pot, or into a pot that has a different shape. It also works when you want to replenish some of the soil and then put the tree back into the same pot and is particularly useful for repotting forest plantings.

Potbound trees
This technique is particularly good when dealing with potbound trees. If the roots aren’t well enough established to hold the soil together when you take the tree out of the pot, this technique won’t work.

azaleaBefore. A well developed Satsuki azalea in the wrong pot.


cornercutCutting corners. Because you’re going from a rectangular pot to a round pot, you start by cutting off the corners.


bottomcutRemoving the bottom roots. With potbound trees you want to remove some of the lower roots. This encourages roots to spread out rather than grow down; because the tree mirrors the roots, it encourage the above ground growth to spread, which is want you usually want with bonsai. Another reason to remove the bottom roots is to make more space to replenish the soil.

Most of the information and photos in this post have already appeared here on Bonsai Bark. Because it’s so seasonally pertinent and because we have so many new readers, it’s always worth another go. Here’s the original post that started it all.

Tools - Koyo25% off Koyo Bonsai Tools. Good tools yield good results
and Koyo Japanese Bonsai Tools are among the best
Additional 5% off all Stone Lantern orders 100.00+